In this article, we are going to discuss content collaboration with workbench.
For many sites, Drupal 8’s built-in workflow for creating content will often do, but as the number of moderators and content grows, it will often require something more robust and scalable; that’s where workbench comes in!
Workbench is a module that has a lot of history, it was originally created out of the need to provide organizational structures granular control over their workflows and grant specific workflow access.
For instance, imagine a legal change in a document where a few lines being changed could be overlooked by a moderator and published.
With Workbench, we could create a new reviews step, or set of steps, on specific content types for moderators who are overseeing the legal details in content and documents, making sure they can’t be published without their say so.
setup
A quick note, this article’s example was created using Drupal 8’s Umami Food Magazine demo, so your experience with this may vary.
First let’s install workbench, go to your site root directory and use composer to require it
composer required drupal/workbench
composer required drupal/workbench_access
Once that’s done, log in as an admin on your Drupal site and enable the Workbench, Workbench Access and Content Moderation modules, then clear out your site caches.
You should now notice up in the admin panel that you have a Workbench tab with the options “My Workbench”, “Create content”, “My edits”, “All related content” and “Configure"

The one thing you should notice is how much friendlier this feels that the normal Drupal “content” screen, which can become a bit cluttered and hard to navigate, from a content curators perspective at least.
workflow
Now go to the workflow screen, you can find this by clicking on “Configuration” in the “Manage” tab of the admin panel.
Here you’ll see the Workflow section with two options: “Workbench Access”, “Workbench" and “Workflows” click on the “Workflows” option.
By default we have one Workflow set up; “Editorial"
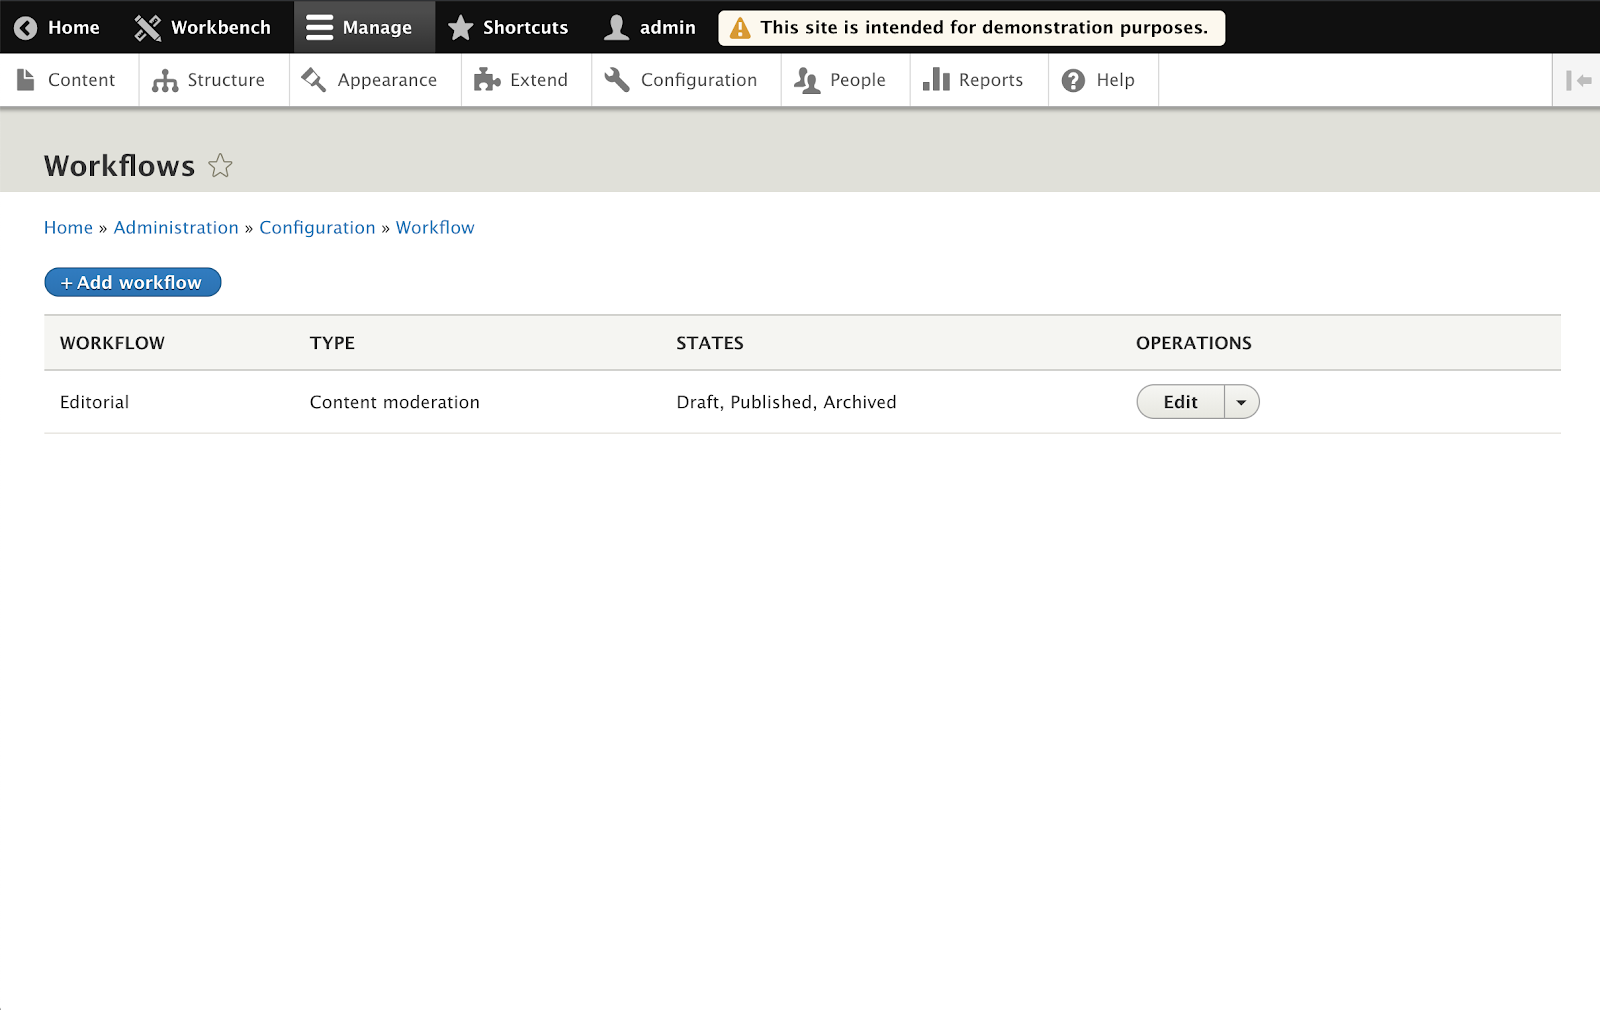
Click to edit this workflow and examine its properties.
We have three states: “Draft”, “Published” and “Archived”
We also have transitions set up we can move:
-
A Draft or Published piece of content to the Draft state.
-
A Draft or Published piece of content to the Published state.
-
A Published piece of content to the Archived state.
-
An Archived piece of content to the Draft state.
-
An Archived piece of content to the Published state.
The workflow is set to work on Articles and Basic pages. So the draft, published and archived states should be available when curating these pieces of content.
access
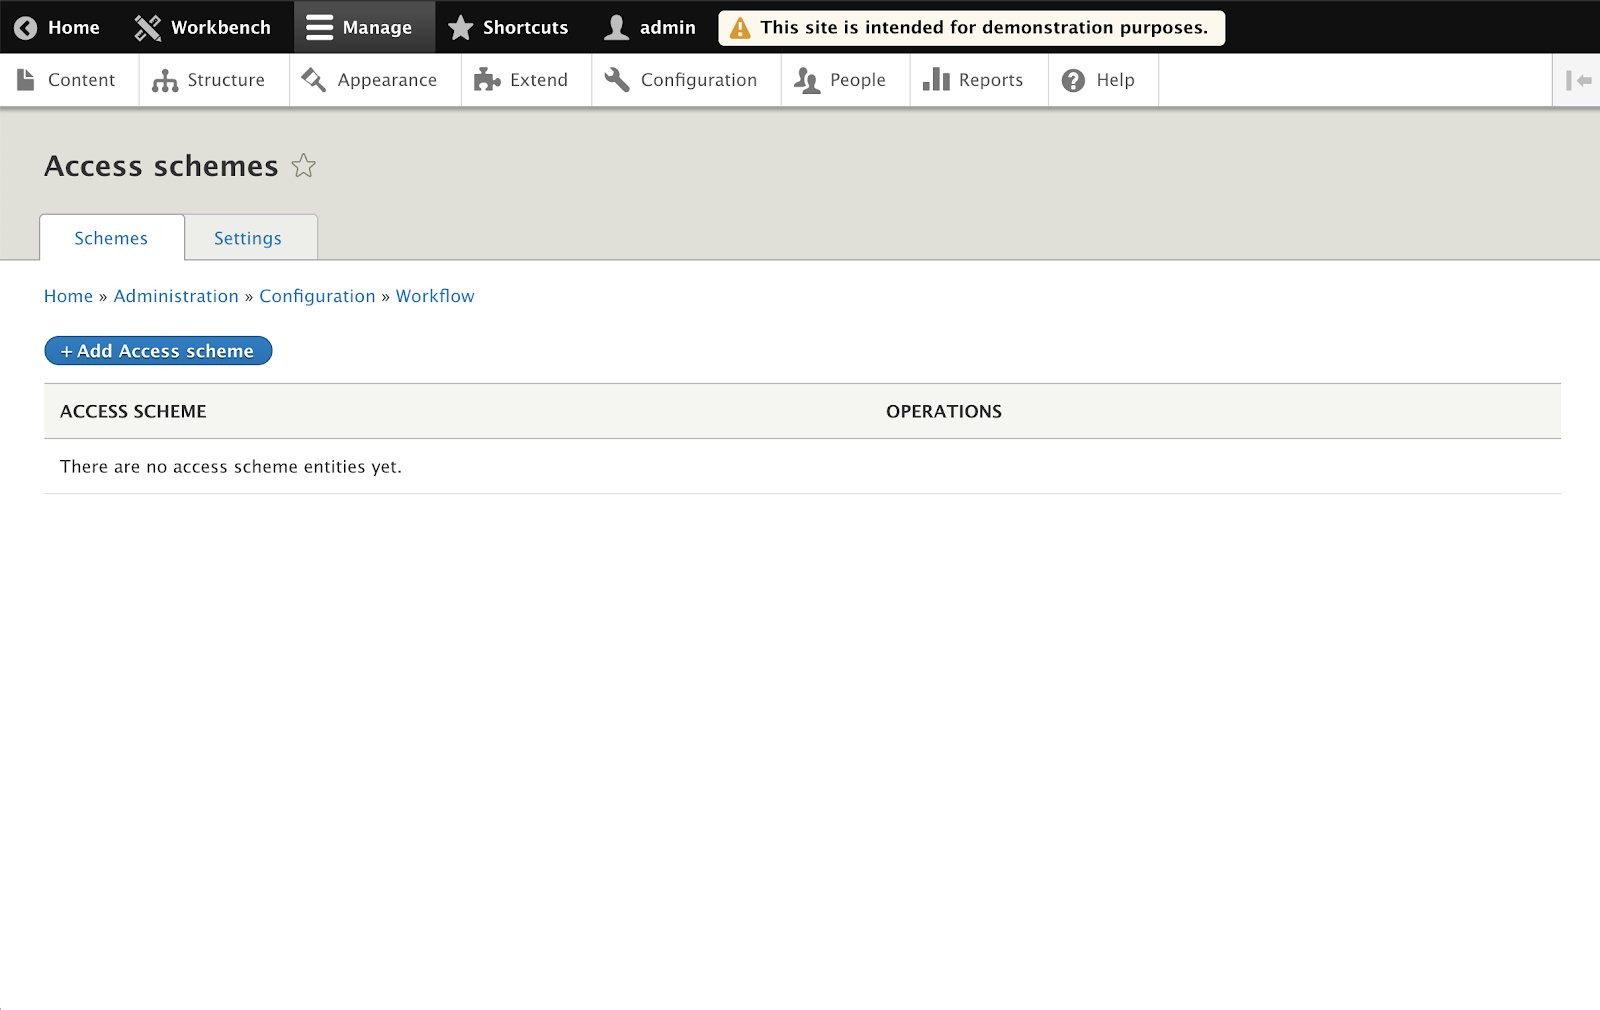
If we want to add access control for workflows, we need to use the Workbench Access module which we installed earlier. Go back to the “Configuration” screen and select “Workbench Access”.

Currently, we do not have any access schemes, and access schemes are disabled by default in order to not break existing site functionality, we can enable them in the settings tab.
Let’s go ahead and create a new Taxonomy access scheme, we will call it Article, with the plural label of Articles. Click save.
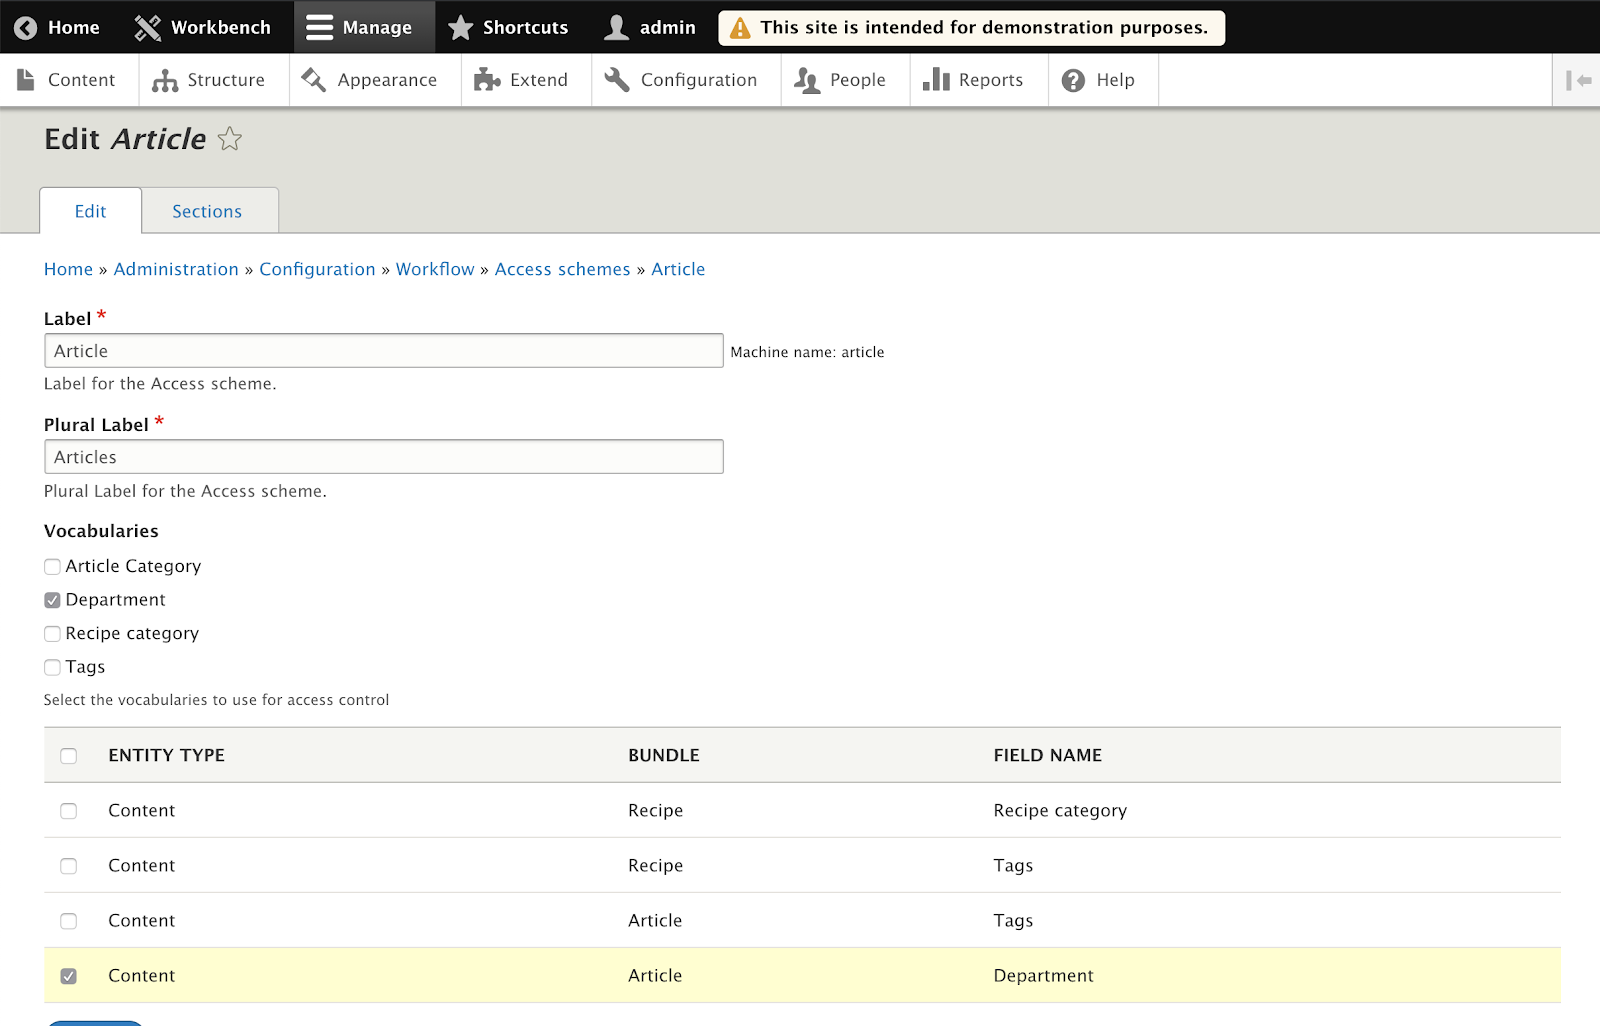
We should now be able to select the Taxonomy Vocabularies we want to use to structure the permissions and also the types of Entities we want to apply the permission structure to.
Let’s create a new Taxonomy Vocabulary, let’s call it Department. Inside this taxonomy add the following Terms:
- Legal
- Management
- Marketing
- Sales
We will then need to add a new Taxonomy Reference field to the Article content type, we will call this field Department and we will make it a required field for our Articles.
Add the Department Vocabulary as the Taxonomy reference and limit it to 1 selection.
For this example, we’re going to select Department as the Vocabulary to use and the Article bundle’s Department field.
With that done we should see we now have an Article access scheme listed. Select the “Sections” operation and we’ll see a list of all the Department Terms and the Editors and Roles we’ve assigned.
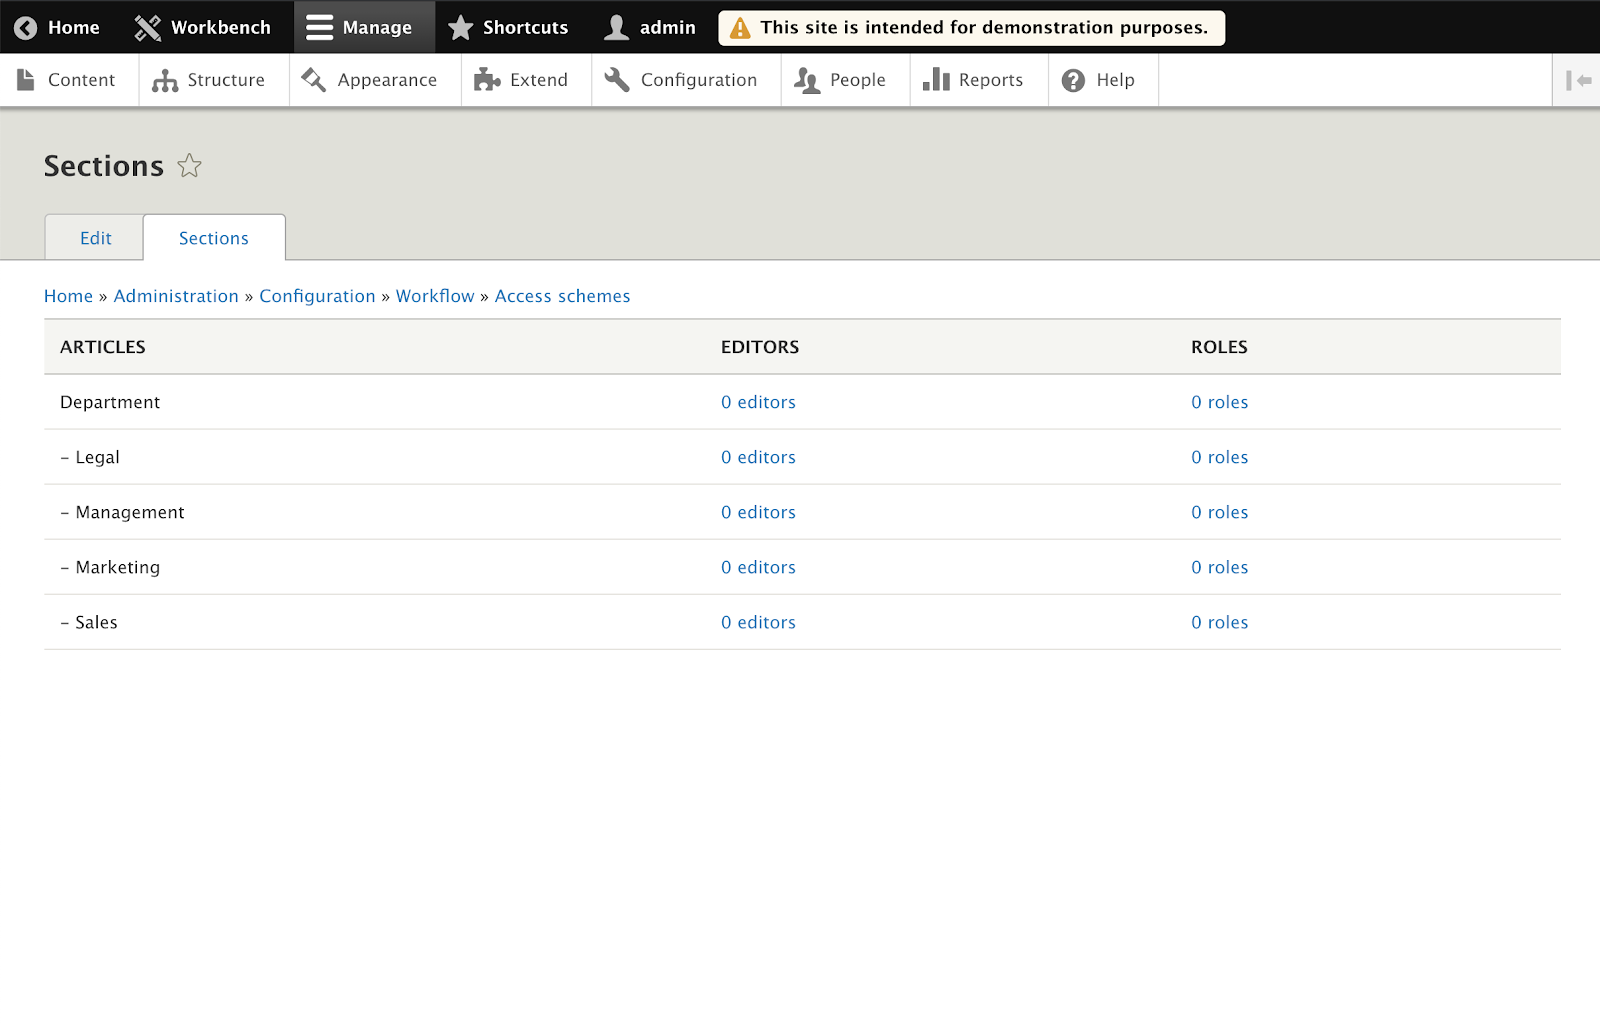
When modifying Sections permissions, we could add Roles or individual Editors to our items. In this scenario to save time, we’re just going to add some individual Editors. If you are using the Umami Food Magazine demo site then you will have a few users you can assign, if not, create a few demo users.
For now, assign one user to Legal and one user to Marketing and remember who you assigned to what.
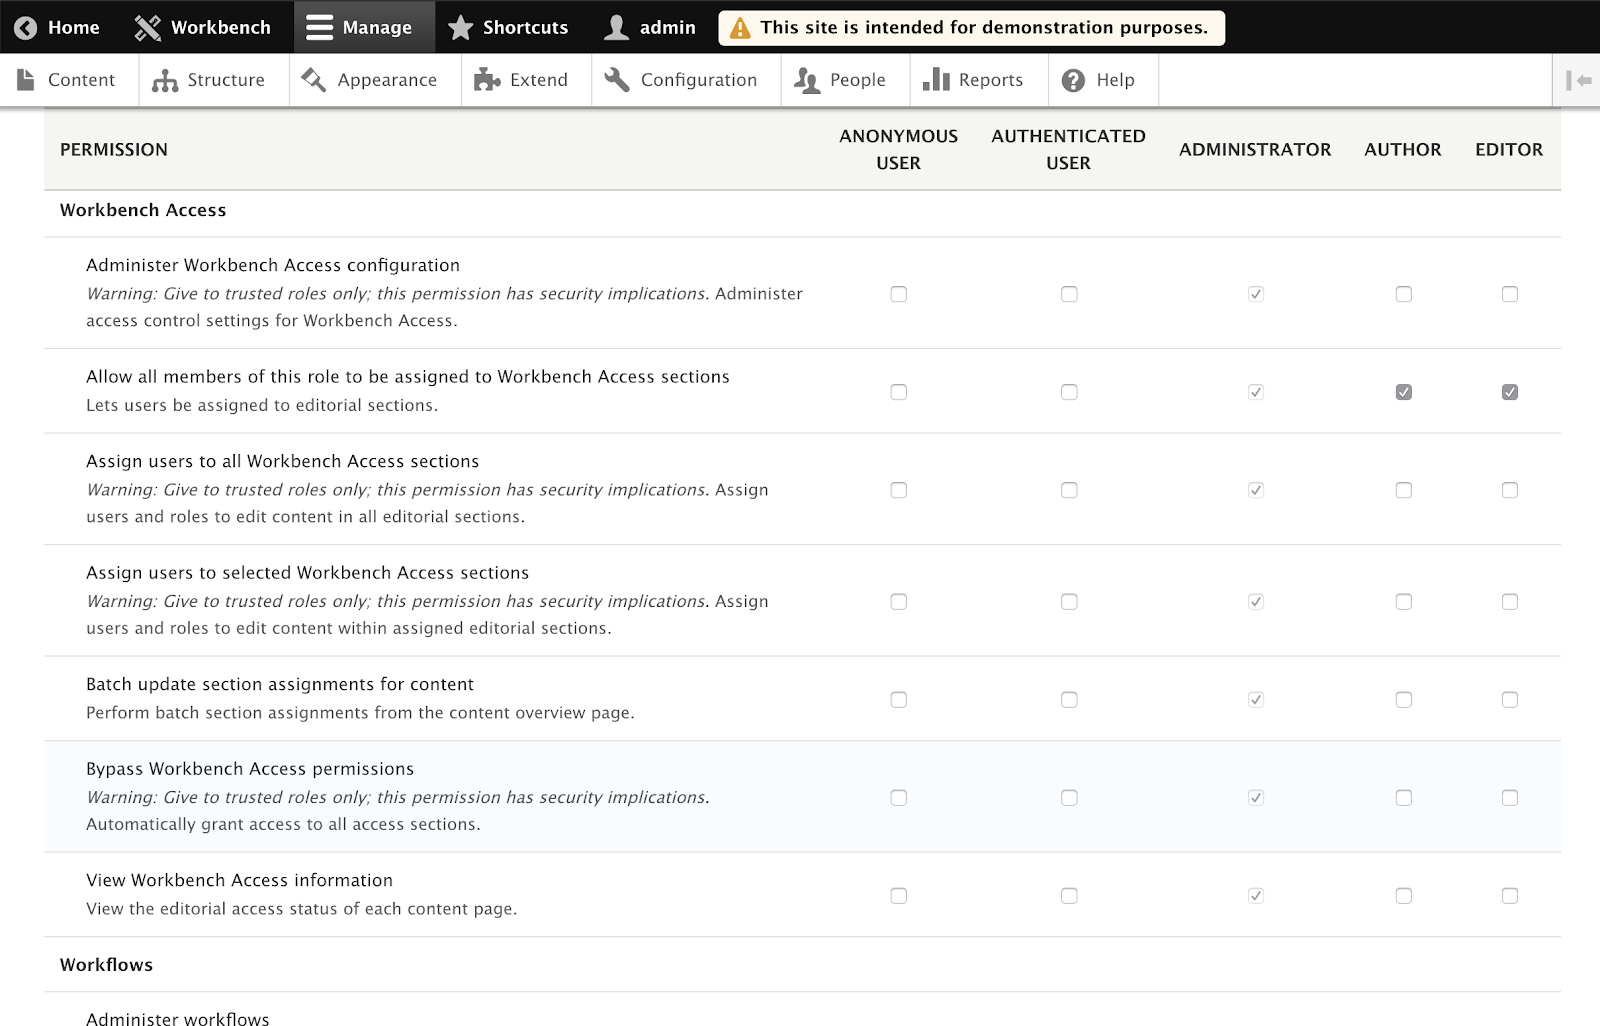
Note, if you are having difficulties adding the users to sections, you must ensure the Roles they have, have been selected in Permissions to be assigned to sections, so be sure to do this.

What we have done is set up content specific permissions here for two individual users. Any content added with the Department of Legal can only be accessed by our editor whom we have assigned to this Department in our sections. The same also goes for the Marketing section.
Setting up individual roles would be a much effective way. As you could imagine, if we had quite a large and restrictive organizational structure, by being able to create Departments and Hierarchies using either Menus or Taxonomy Vocabularies, we could really fine tune our documentation access permissions.
Maybe we would only want a Legal team handling documentation that is very sensitive, or perhaps we would only want a Biology Faculties Researcher permission to access or modify Research papers.
We could either create section permissions with department tags or new content types. With Workbench, we could really customize what people get to edit and create, who gets to see what.
transition permissions
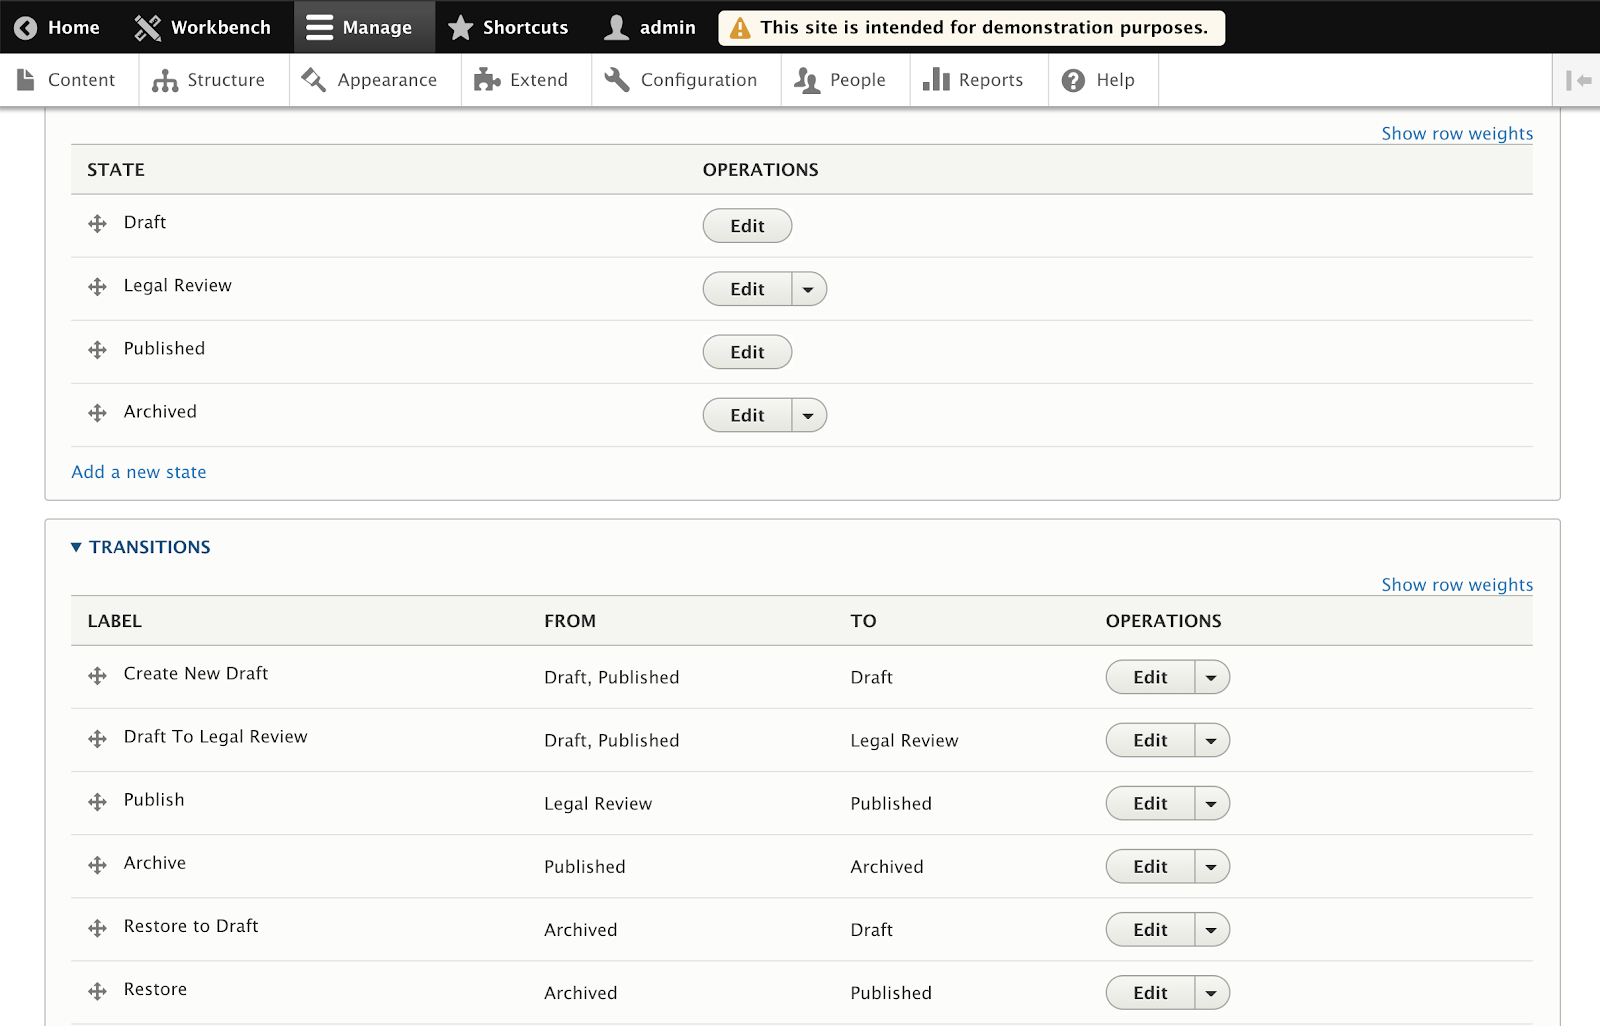
Another thing we should also touch on is transition permissions. Let’s go back to our Editorial Workflow. In the “States” section, add a new State and title it “Legal Review” and place it in between Draft and Published.
Next, we’ll modify the transitions, we want to make sure that all Drafts pass through the Legal Review state before we can simply Publish them. We set the Published transition to go from Legal Review to Published state and then create a new State called Draft To Legal Review which will allow us to move Draft or Published content to the Legal Review state.
Here’s how it looks.
Now we’ll go ahead and create a new Permission Role called Legal Team. Then we’ll go to the Content Moderation under Permission Settings and make it so only our Legal Team Role can use the Publish transition, but allowing our Editor Role to set a Draft or Published piece of content to Legal Review.
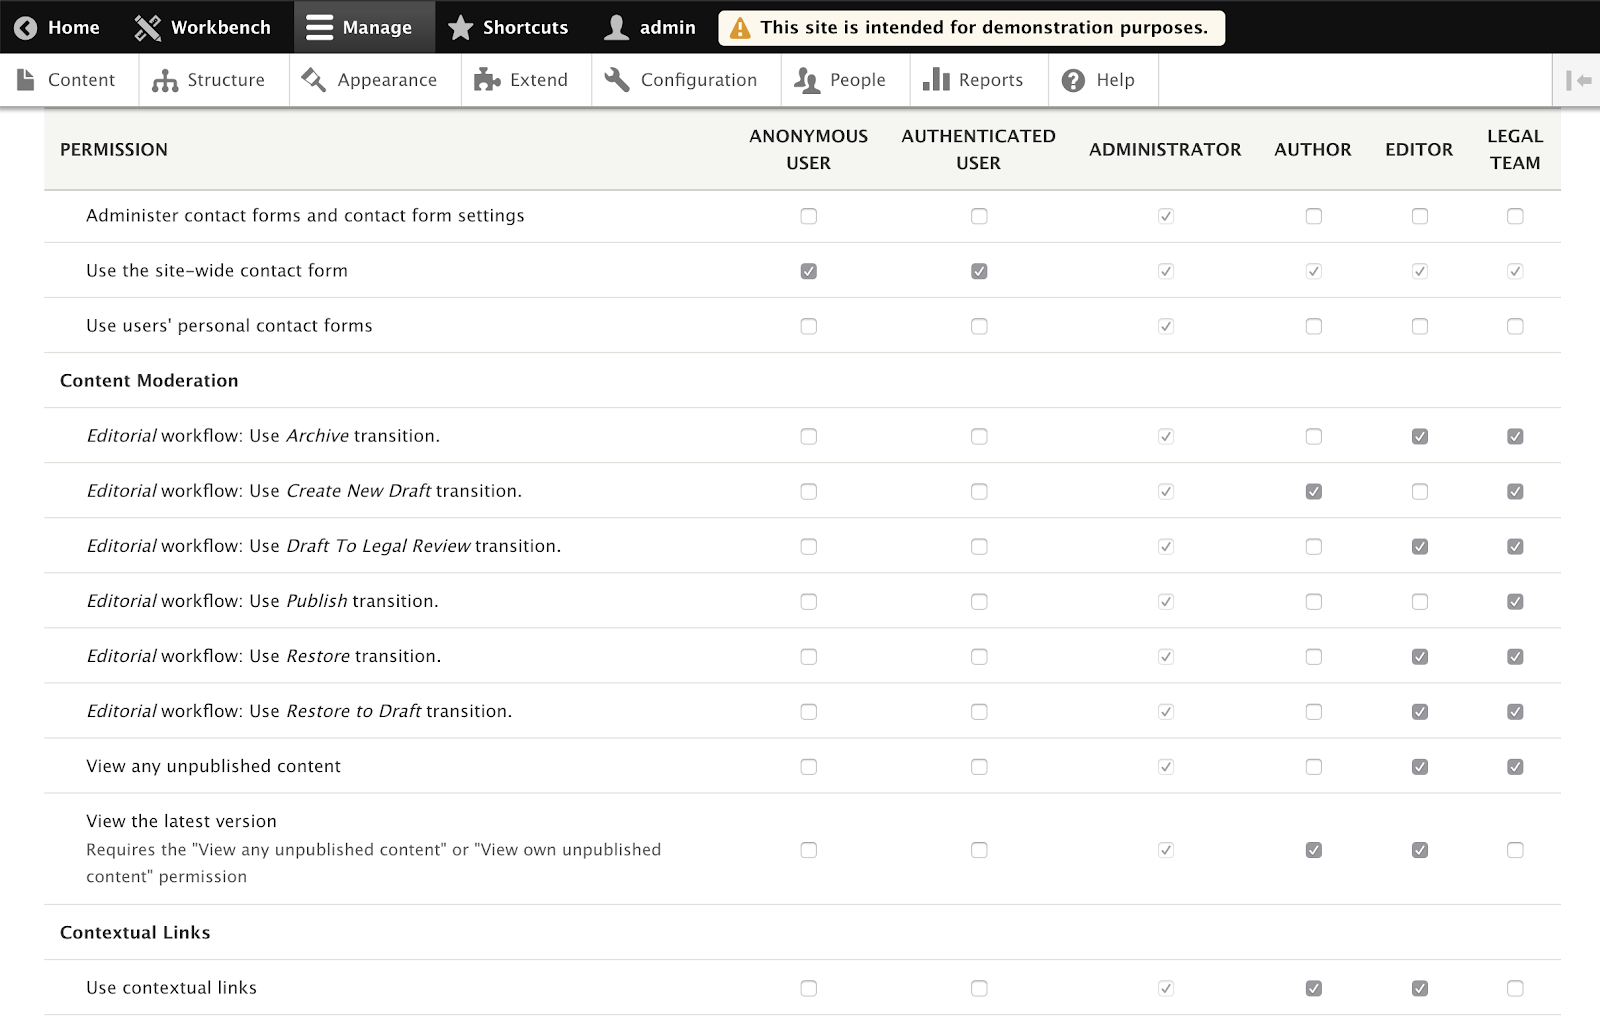
The flow now might work like this an Author could create a new piece of content which would be flagged as a new Draft. Our Editor could take the Draft, and once they have made their edits, could flag it as needing a Legal Review, which our Legal Team would then be able to give their expert review before flagging the content as published.
summary
Although this article didn’t get as in-depth as it could have, hopefully, it showed you some of the capabilities of the Workbench module. You can see that it could easily get quite complicated, by using the Workbench Access module you could maintain a Taxonomy of Departments or Faculties or Categories or whatever you wanted, to granularize your content or entity permission structure based on roles or individual users.
Having the control to create customized transition states can take you away from the default Draft, Published and Archived states, passing a piece of content through multiple different chains of editorial seniority before finally seeing daylight.
Allowing only some Roles to transition content away to another member of the teams' control will prevent the possibility of something slipping through unmoderated.
In fact, by using the Workbench modules dashboard, you can remove some of the technical fears team members might have when confronted with a CMS.